A = l +/- l'
Skip To:
1. The Celestial Sphere
2. The Astronomical Triangle
3. Lines of Position
4. References and Postscript Code
If the resources are not available to solve the astronomical triangle, a method of plotting "lines of position" is a reliable way to pinpoint your location. The geometry of this method is explained below and step by step instructions are given for determining your location.
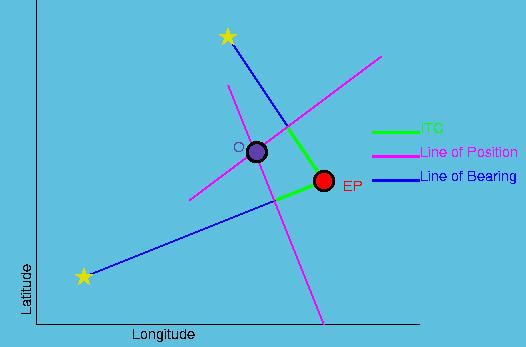
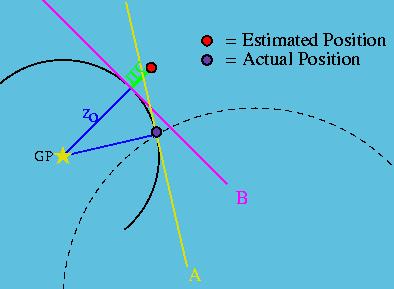
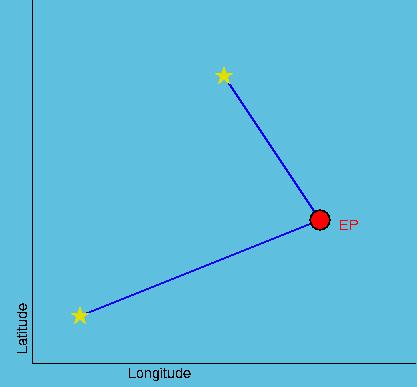
Step 1: Find the current Estimated Position (EP). If this method is used throughout the voyage, and is performed regularly, then it is not dificult to calculate the estimated position by using d=vt, and performing simple vector manipulations to account for drift due to currents. The EP need only be within a 50 mile radius of the actual position. Plot the EP on a map or chart.
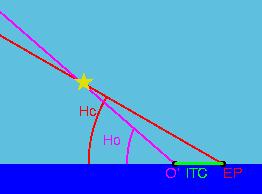
Step 2: Use a sextant to observe the altitude of 2 or more stars. Use an Almanac to make the appropriate corrections. The resulting observed altitude is called Ho.
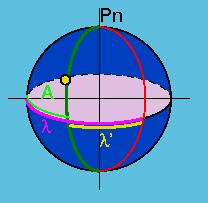
Step 3: Compute the azimuth A of each star.
Step 4: Compute the calculated altitude Hc by using the first sight reduction formula (1), the estimated position, the calculated azimuth, and the declination and GHA of the star from the almanac.
Step 5: Calculate the intercept (ITC).
Step 6: On the map or chart, draw 'lines of bearing' from the EP to the groundpoint of each star. The groundpoint of the star is the coordinates of the projection of the star onto the earth, and is obtainable in any astronomy almanac.
Step 7: Draw "lines of position". Each Line of position must be perpendicular to their line of bearing, and must cross the line of bearing at a distance of ITC from the EP. Your actual location is where the lines of position cross (O on Figure 10 below). If using more than 2 stars, it is unlikely that the Lines of position will all cross in exactly the same spot due to small errors. In this case the method of least squares is used to obtain the best fit, and determine location.